


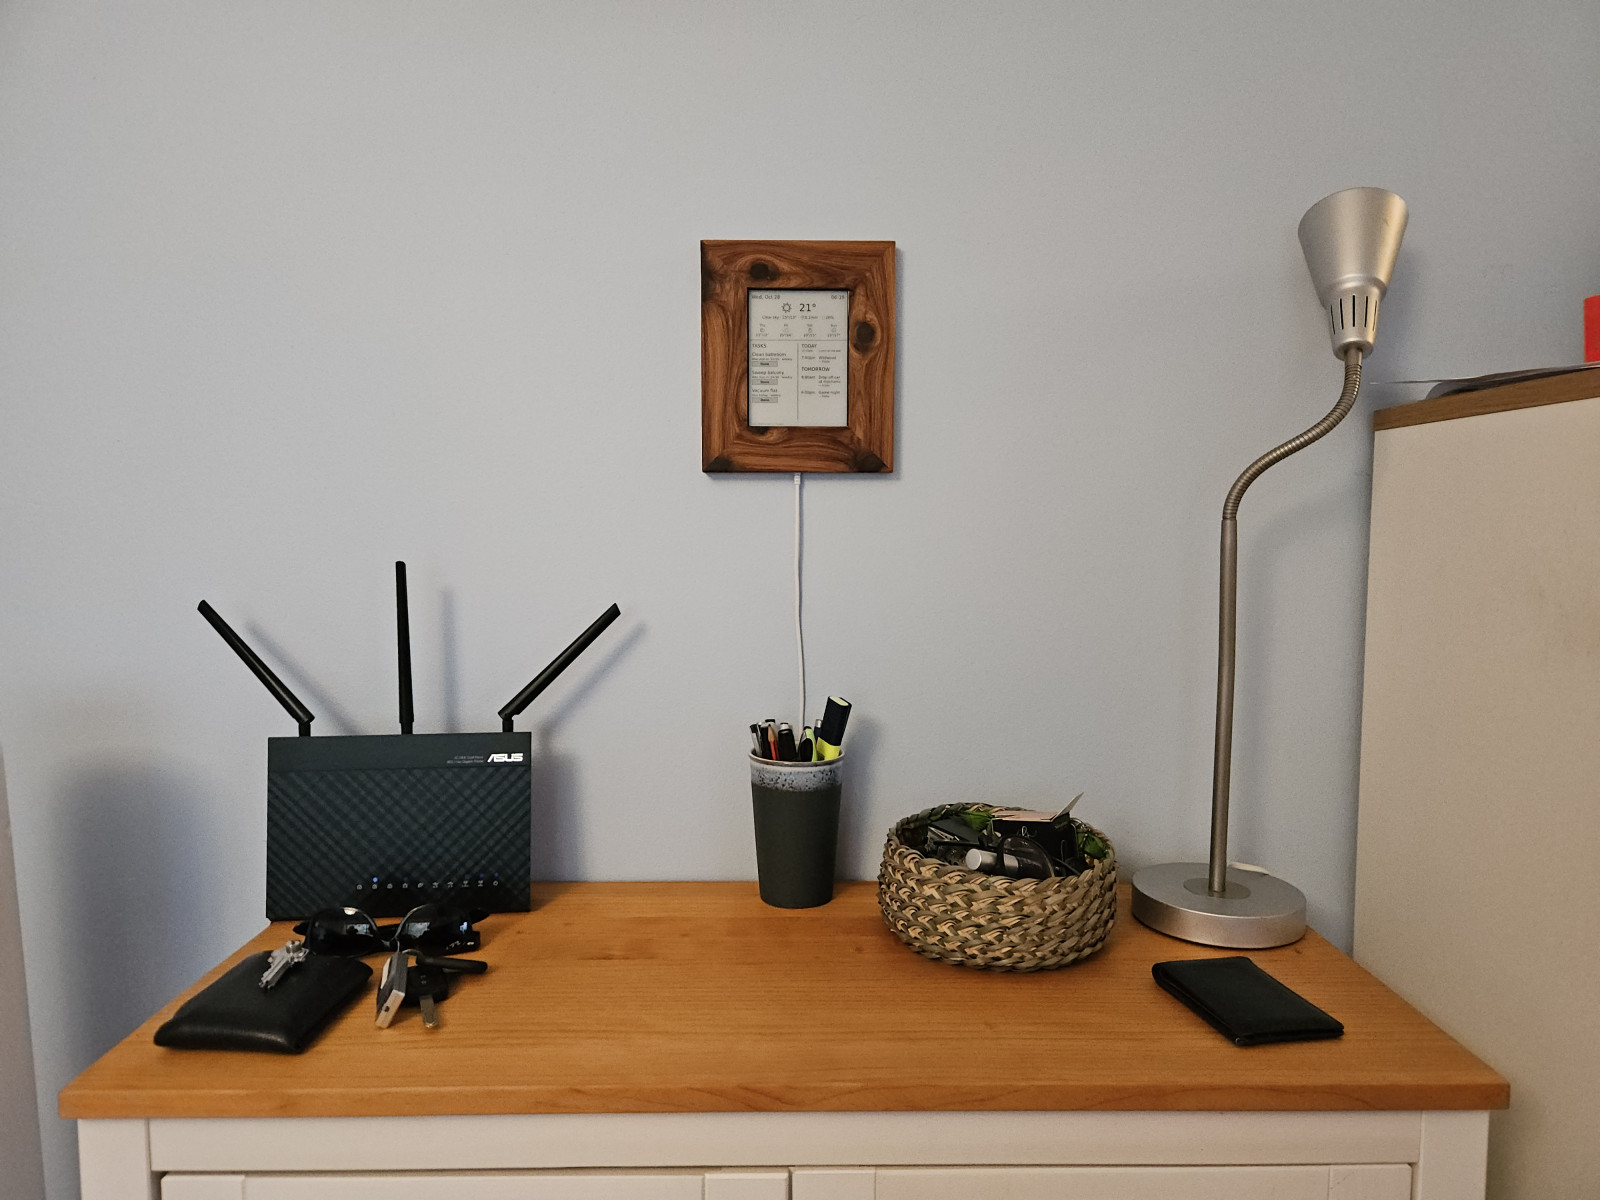
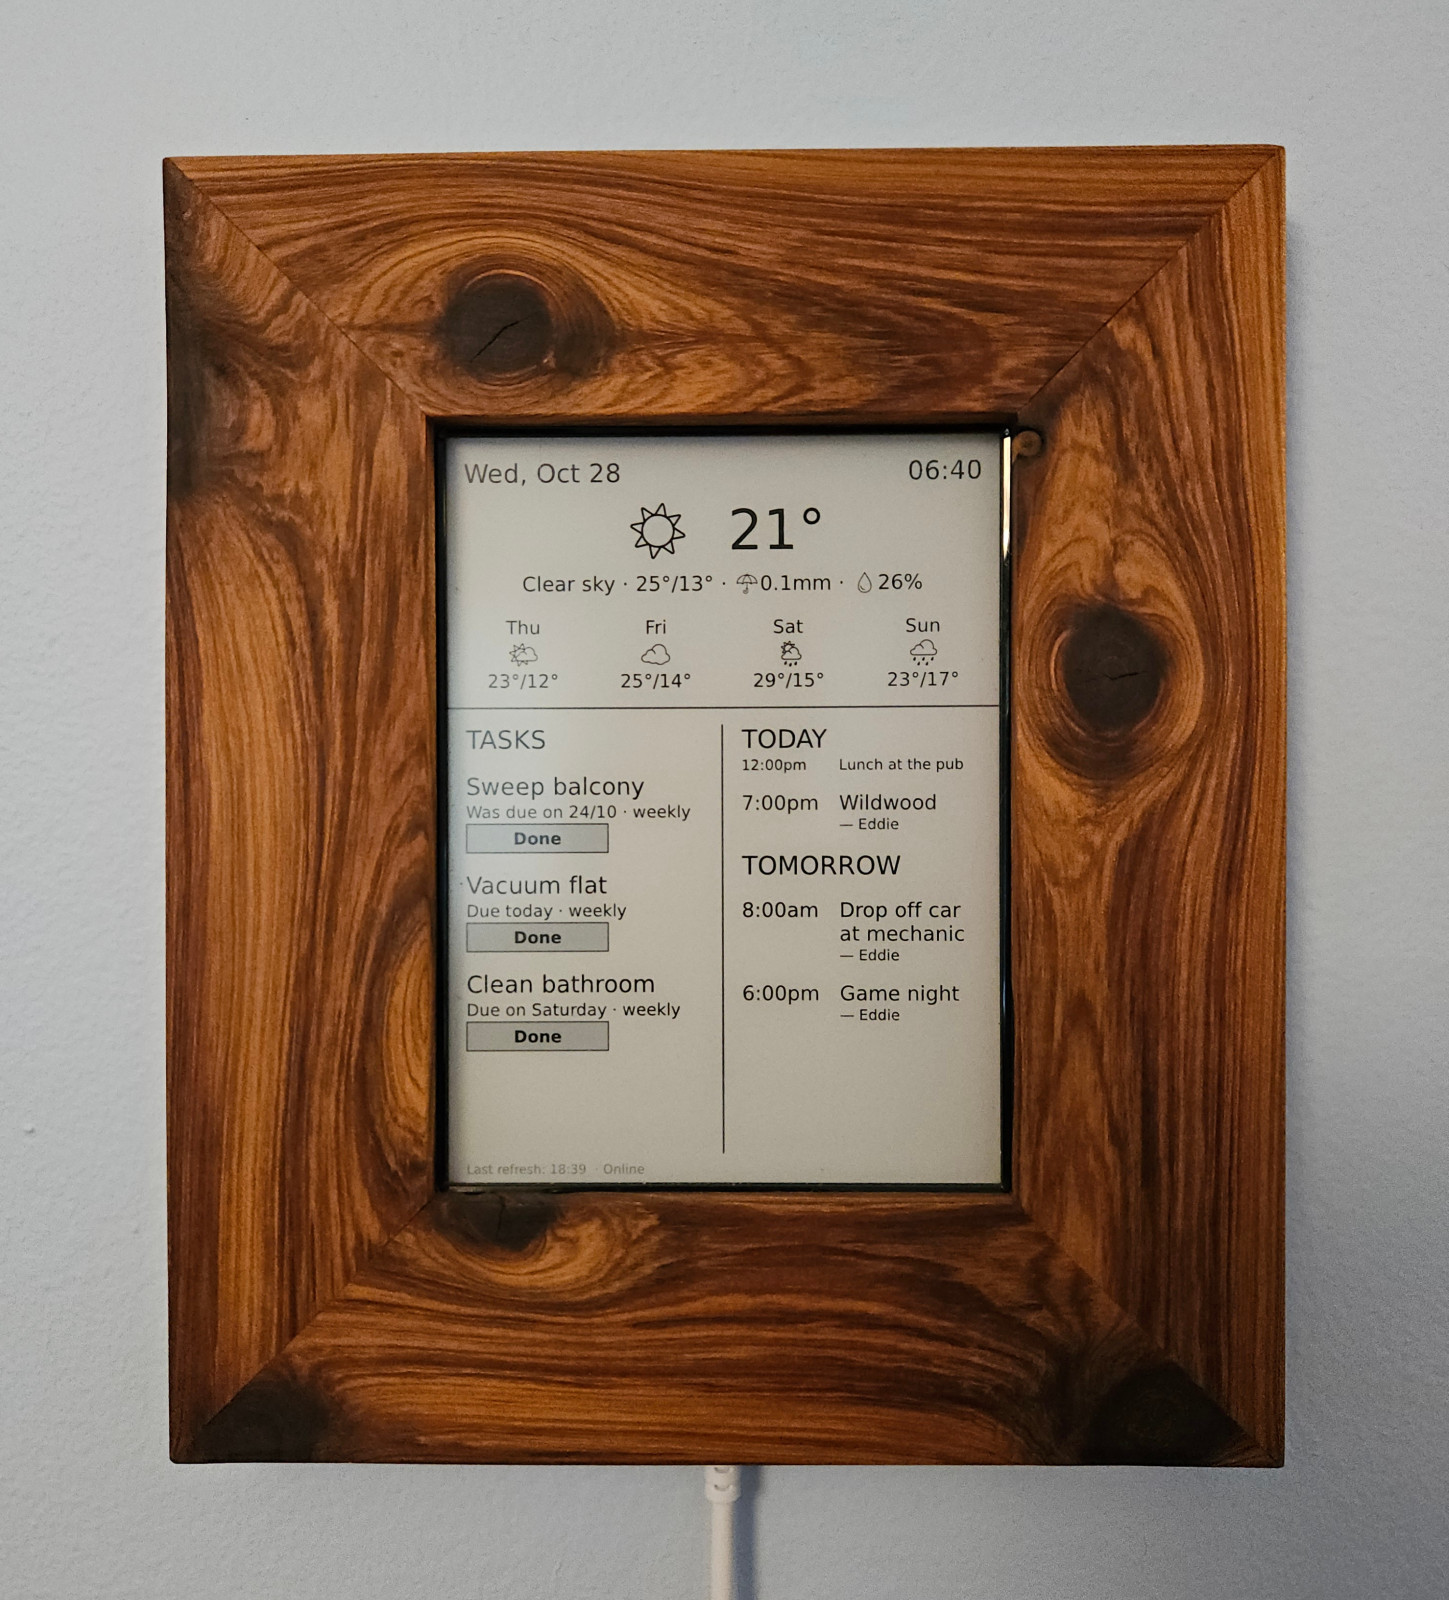
I built this E Ink home dashboard in the spirit of calm technology. It was inspired by projects like TRMNL, and many similar DIY solutions. It shows weather, household tasks, and calendar events for today and tomorrow.
It’s made from an old Kobo e-reader that was due for replacement. After 11 years, the battery was really showing its age. The screen, on the other hand, looks as good as the day I bought it. E Ink requires no backlighting in a well-lit environment, and doesn’t suffer from burn-in, which makes it perfect for a calm, ambient display.
The software is custom-built for this project (using AI). When I started creating it, I knew about the TRMNL project but I thought it was just a paid product. I didn’t realise it’s actually an open-source ecosystem, with a self-hostable server and a Kobo client. I did try setting up a TRMNL server and client, but it wasn’t intuitive at all, and by that point I’d already built a lot of what I needed.
Hardware
The e-reader I’m using is the Kobo Glo HD, which I’ve had since 2015. A Kobo is great for this kind of thing, because it’s very easy to mod. I’d previously tried to do something like this with an old Kindle, and they make it very difficult, which is just one more reason not to buy a Kindle.
But I’m not just going to slap a Kobo on the wall. If this thing’s going to be prominently displayed in my home, it needs to look good. So I built a frame from one of the prettiest woods out there: Cypress Pine. I’ve had a few pieces of it sitting around in my garage for the last few years waiting for a suitable project. They sell it at Bunnings in the form of fence palings, which seems like a waste of such nice wood, especially since fences are usually painted.
It’s a mitre-jointed frame, around 40mm thick. That’s a pretty thick frame for the Kobo’s 6-inch screen, but I needed enough material to accommodate a few bits of hardware I would be adding. I glued it all up using the same strap-clamp technique I used with the DnD screen frame.
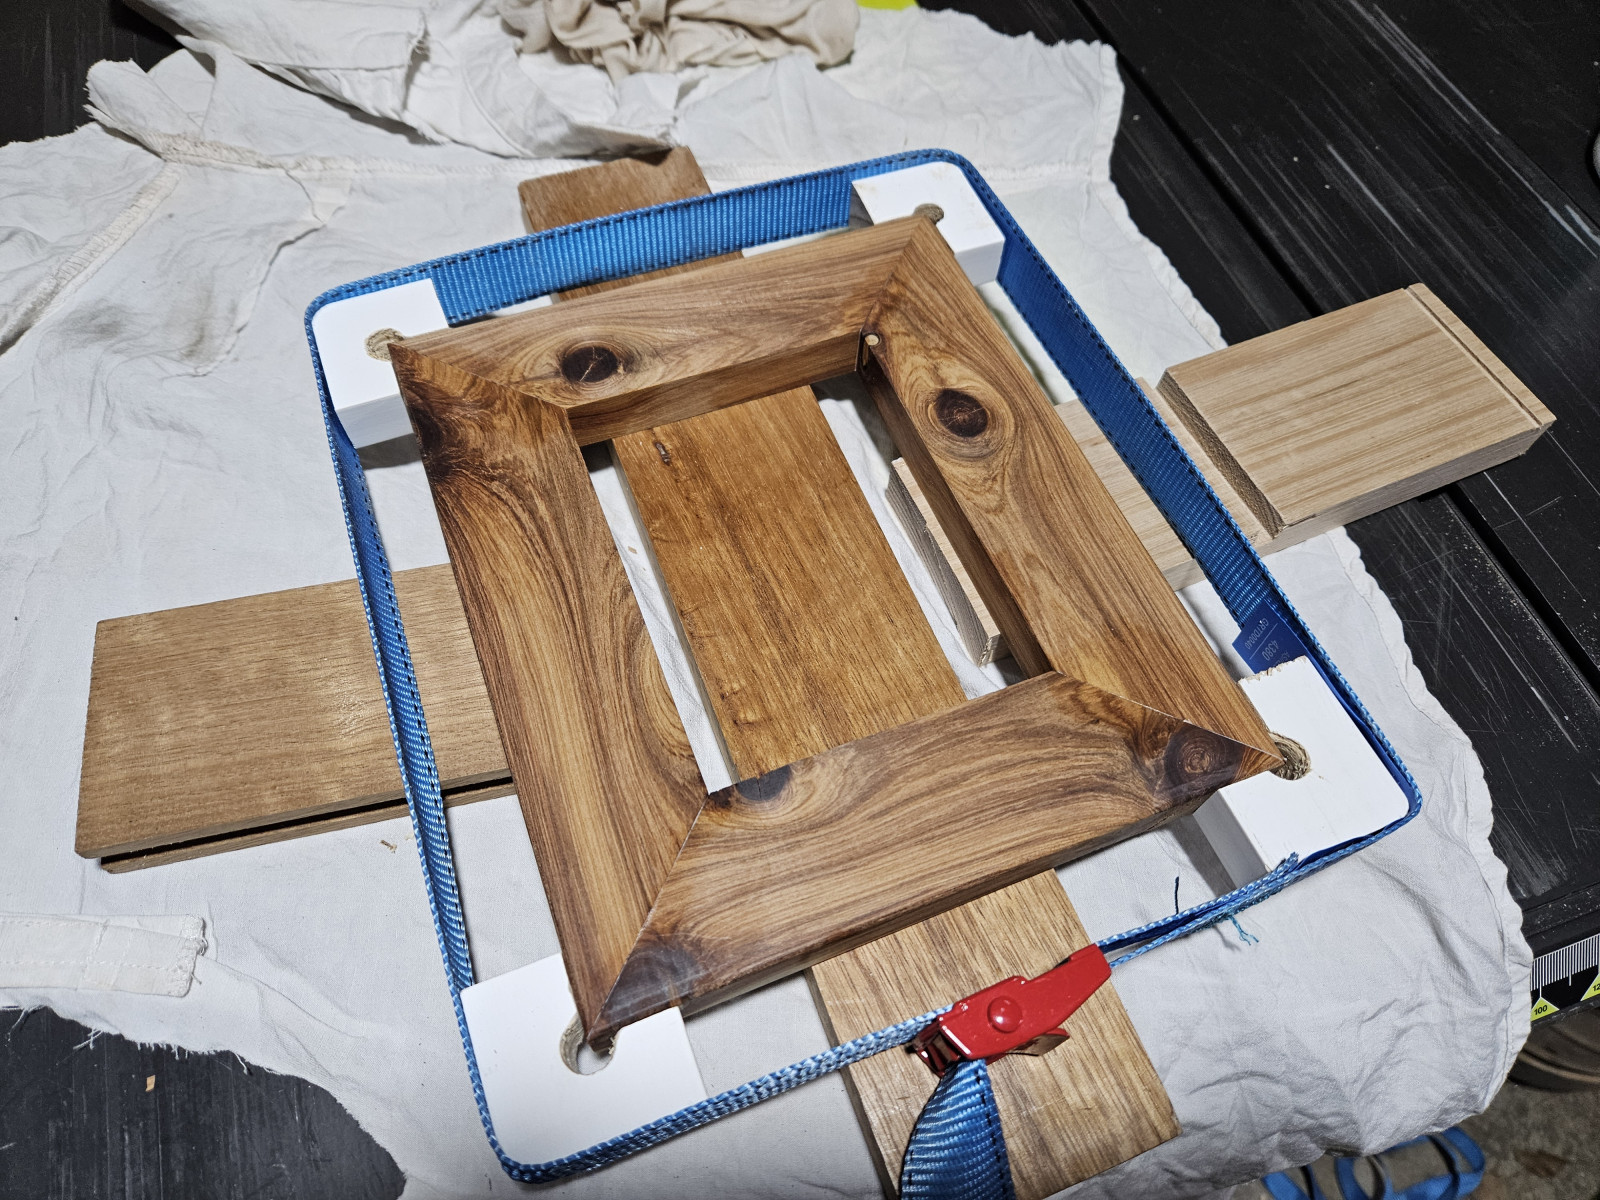
Then I routed out indentations for the Kobo and other hardware to fit into.
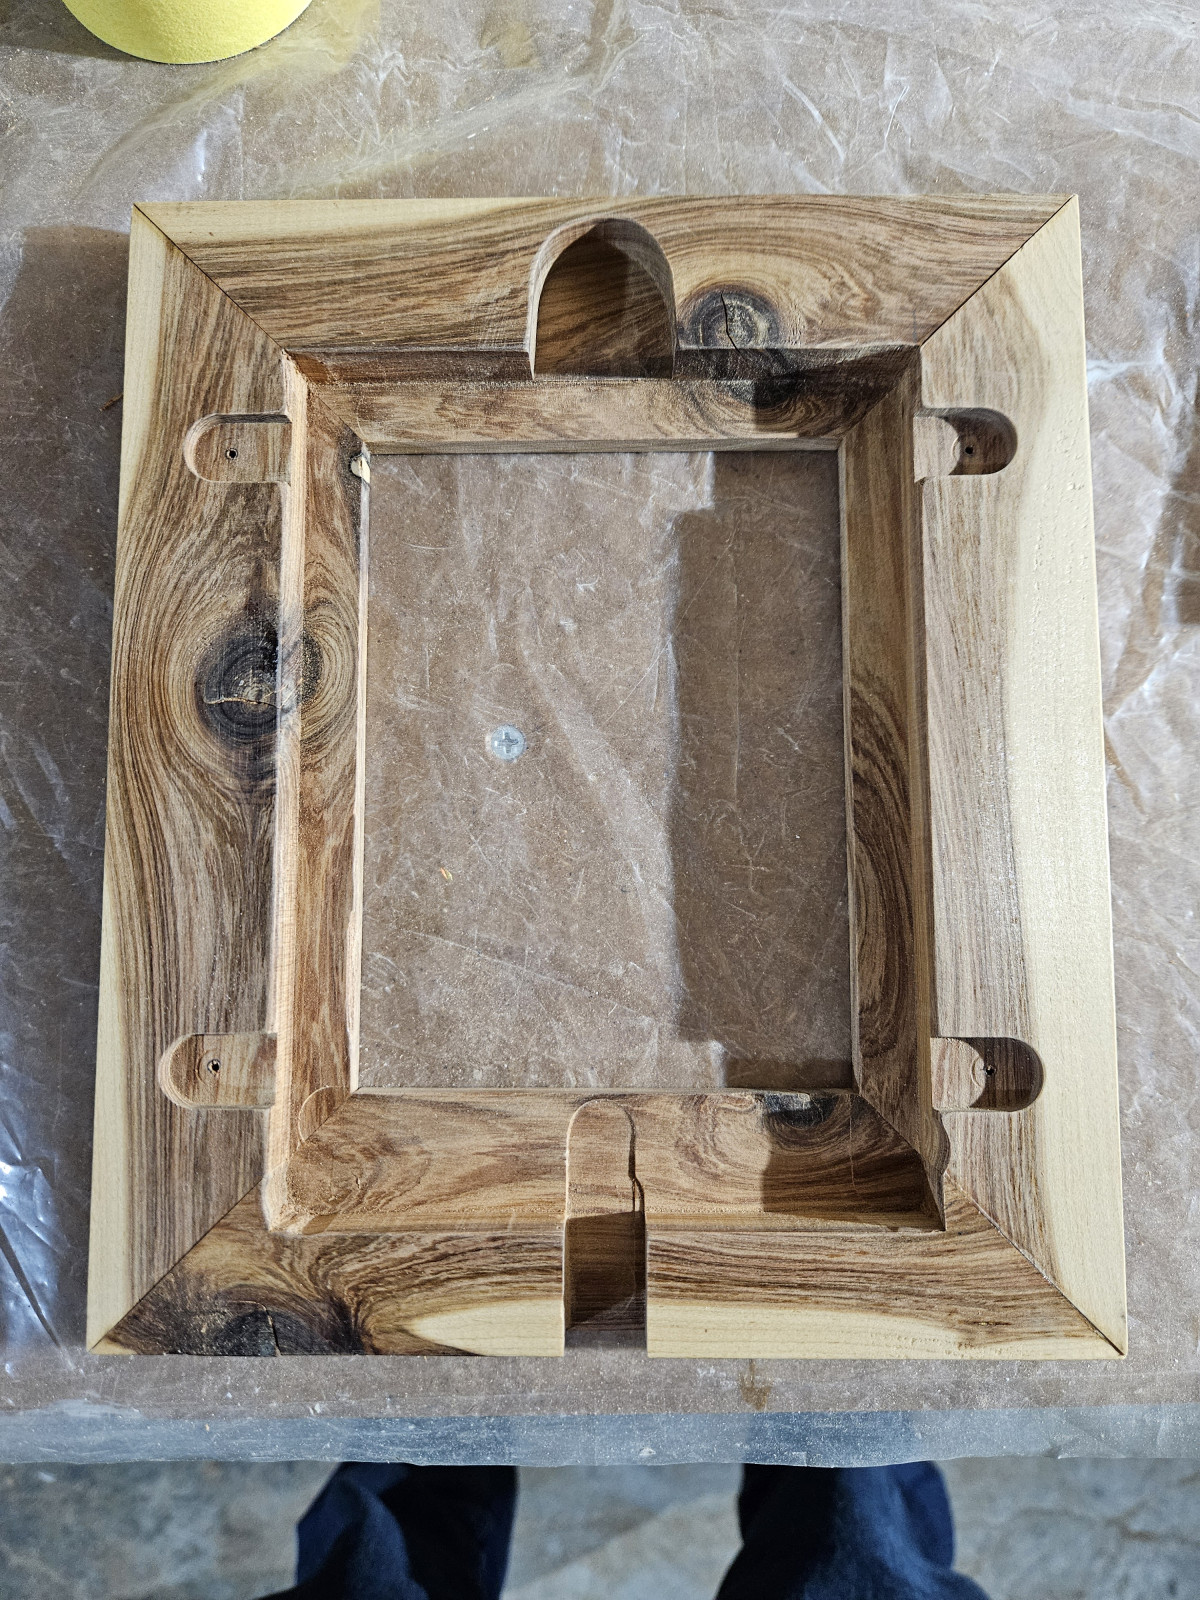
Lots of sanding later, I put a boiled linseed-oil finish on the wood and installed the Kobo along with the 3D-printed hardware: two strips to hold the device in, and a hanger piece at the top.
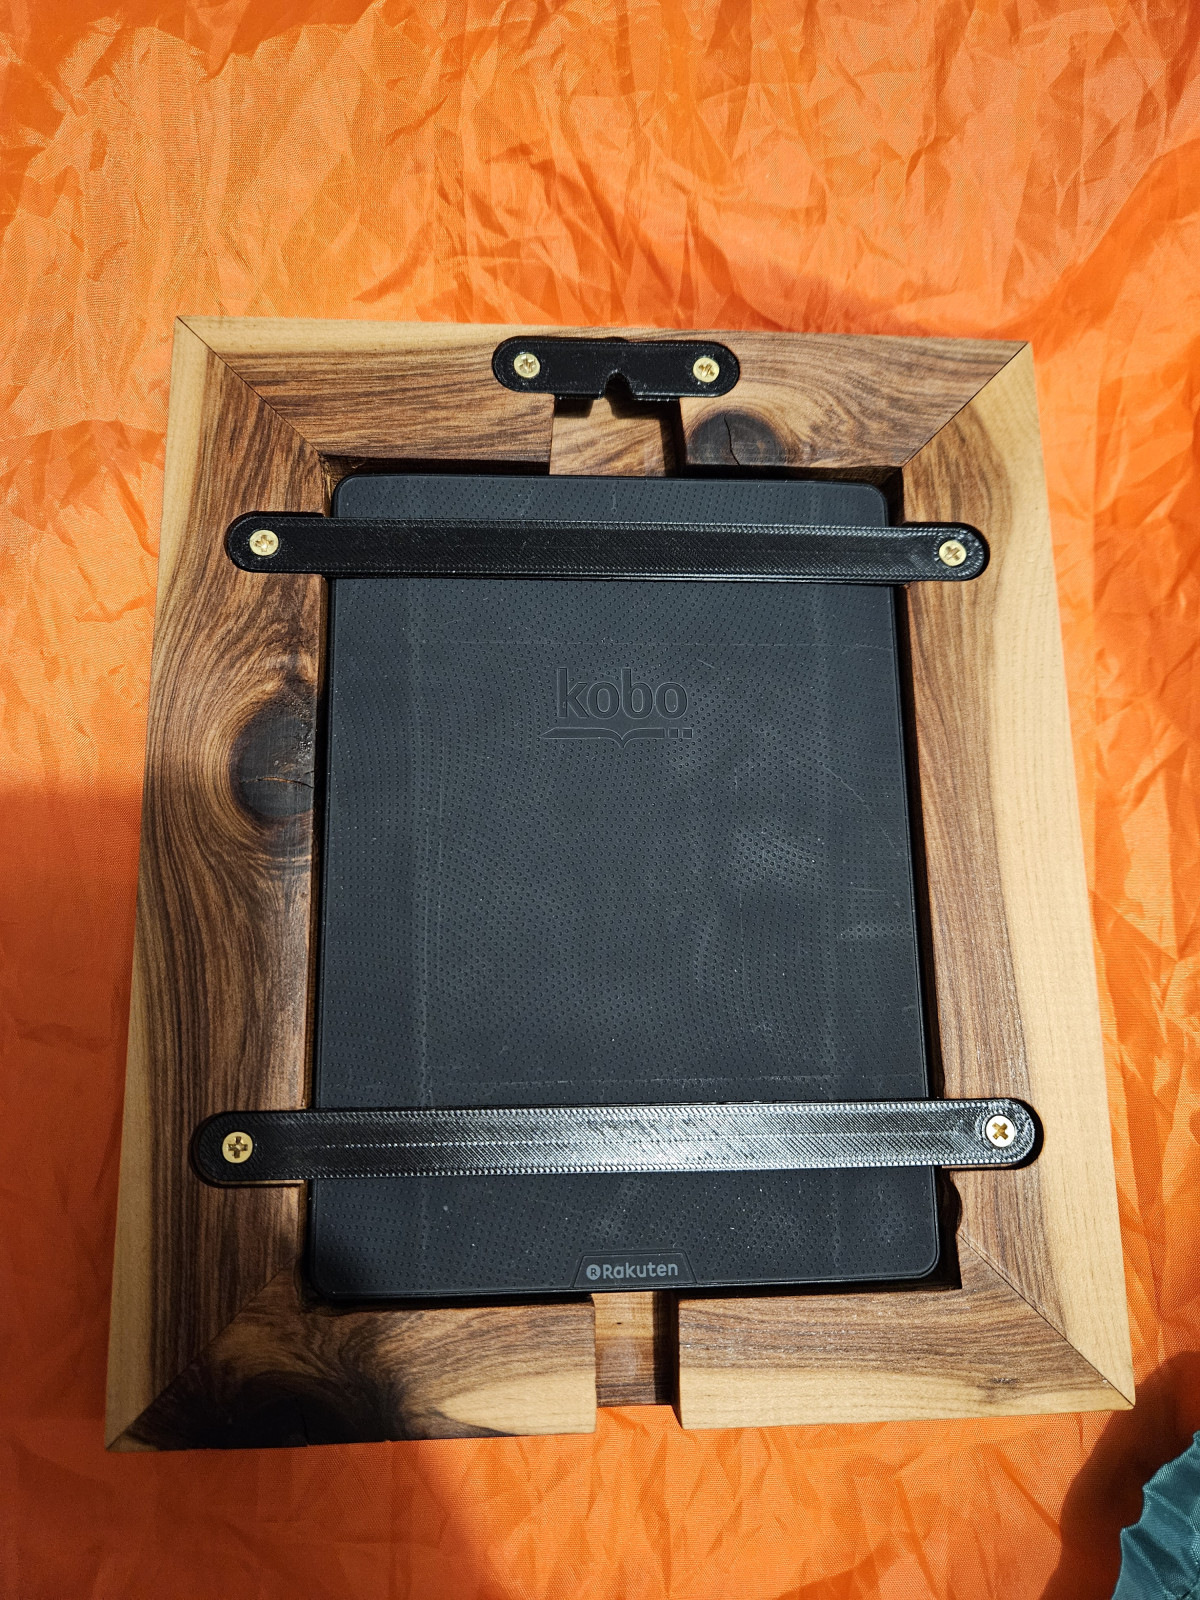
The power button on the device is at the top, so I needed enough room under the hanger piece to be able to access it. That was the main constraint for the thickness of the frame.
Software
The software I developed for this originally had the server and client closely coupled as one project. But I ended up splitting them in such a way that the client can easily be used with other servers to show any information in any layout, which is the main interesting part here.
Server
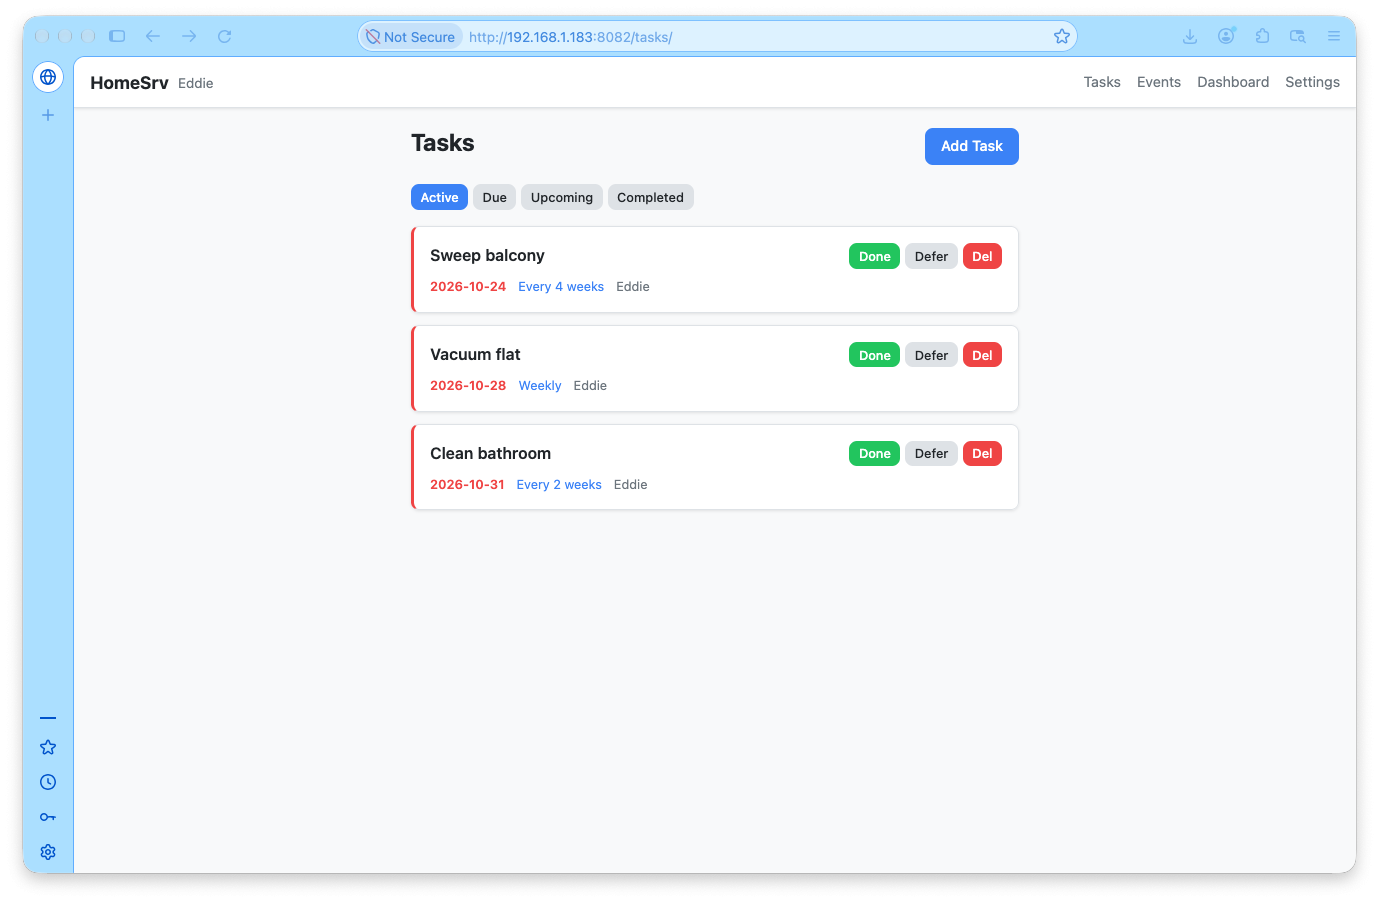
The server, called HomeSrv, barely matters. It’s a vibeslop PHP CRUD app with an SQLite database, holding household task schedules, iCal URLs for our calendars, and latitude/longitude to pass to the Open-Meteo weather API.
For household tasks, it tracks when each one was last marked as done, and calculates when it’s due next based on the configured schedule. There’s also a simple web interface (powered by HTMX, because why not?) for updating settings and managing tasks.
The secret sauce is the API for the Kobo client.
Client
The client is called Koboard. It’s a C program, launched via NickelMenu.
The typical way to render an E Ink dashboard is to generate an image on the server and send it to the device for display. But I wanted to leave the door open for some measure of interactivity, so I decided to have the interface rendered on-device.
The way it works is analogous to a browser rendering a webpage. The server sends a data structure containing the page layout, like a stripped-down version of HTML but as JSON. It has divs, text (including emoji), borders, and background shades. The client renders all this via FBInk, and makes no assumptions about what the content will be.
This means that the Kobo client I’ve developed could be used with any server for any type of dashboard. HomeSrv is just the first server to integrate with it.
The structure looks like this:
{
  "schema": 1,
  "refresh": { "seconds": 300 },
  "root": {
    "kind": "box",
    "pad": 30,
    "gap": 10,
    "children": [
      {
        "kind": "text",
        "text": "{clock:%H:%M}",
        "size": 40,
        "key": "clock"
      },
      {
        "kind": "text",
        "text": "Hello from my server",
        "size": 14
      },
      {
        "kind": "box",
        "w": "40%",
        "border": 2,
        "pad": [8, 12, 8, 12],
        "action": {
          "kind": 1,
          "path": "/done",
          "body": "id=1",
          "toast": "OK!"
        },
        "children": [
          {
            "kind": "text",
            "text": "Done",
            "size": 11,
            "style": 1,
            "align": 1
          }
        ]
      }
    ]
  }
}
Each node is either a box or text. Boxes work just like CSS flexbox elements, with vertical or horizontal layout. Width, height, padding, borders, and background/foreground colour are supported. Text nodes can specify size, italics, bold, alignment, and line clamping. The {clock} placeholder text (with optional format string) will render the time and/or date, and kept up to date on the client.
Elements can respond to a tap via the action property, sending a request back to the server on the specified route. For my server, that’s used to mark tasks as done. If the action has a toast property, that value will replace the button’s content until the UI refreshes a few seconds later.
The JSON data also specifies the refresh interval and a schema version.
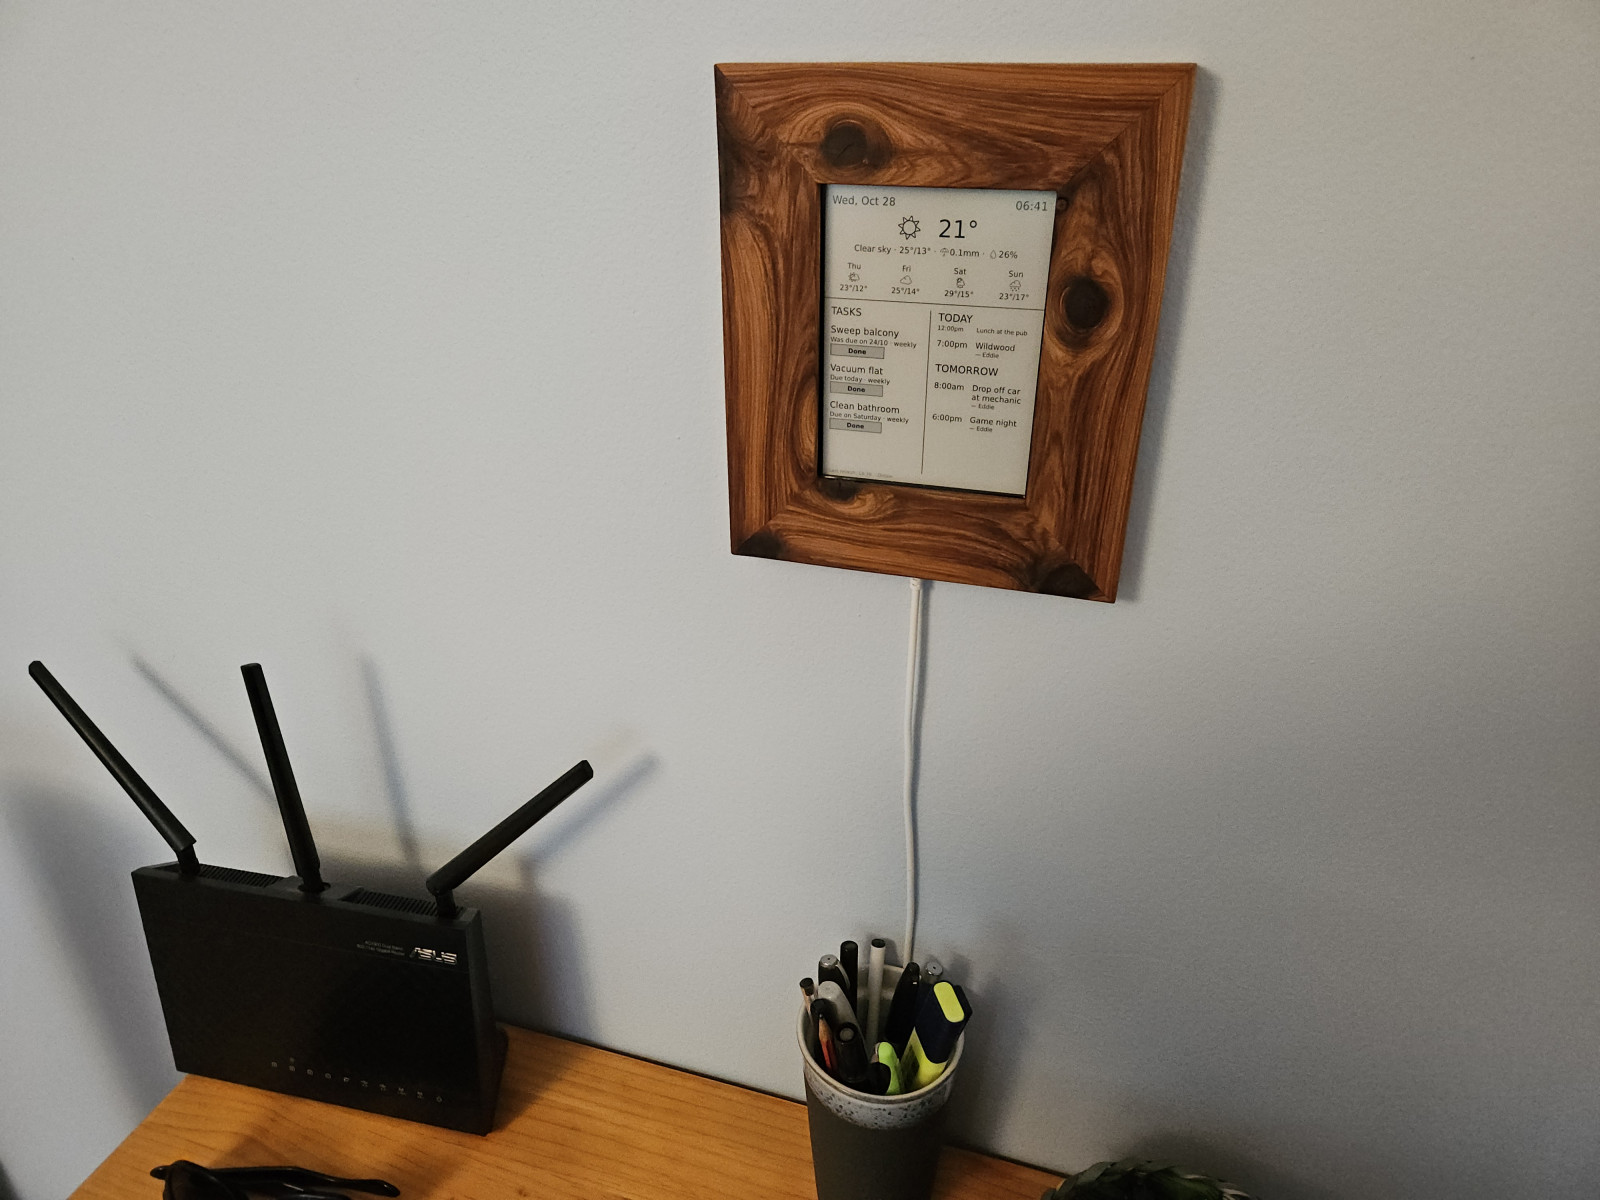
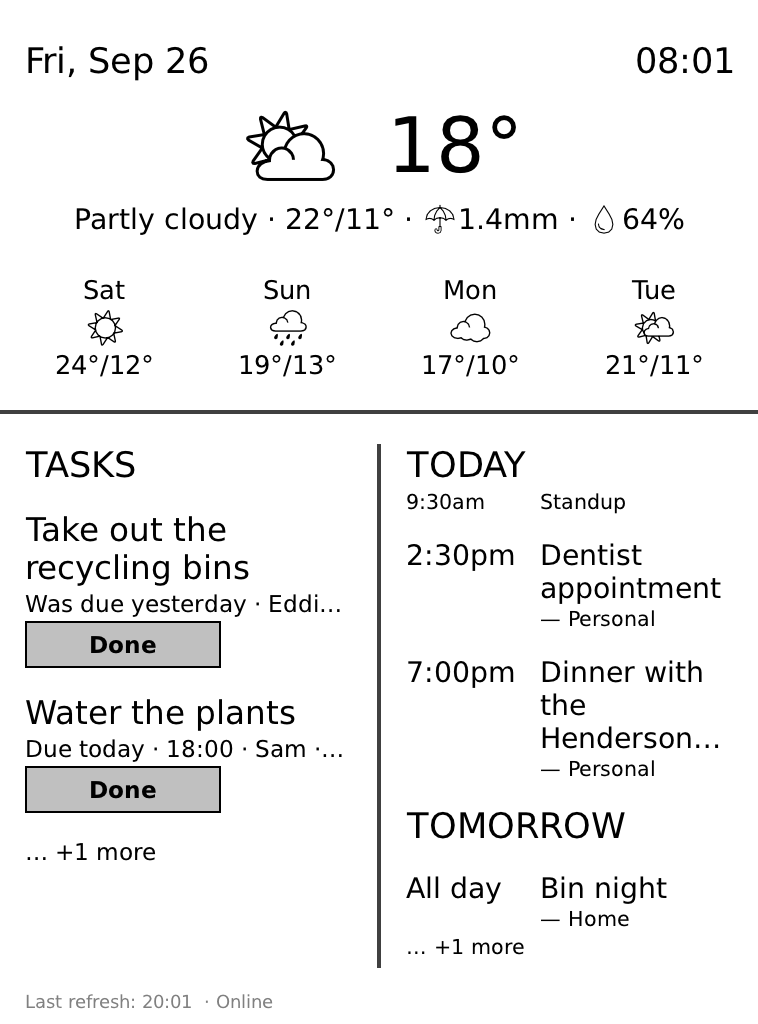
The layout I’ve chosen for my dashboard has weather first and foremost, with tasks and calendar events side-by-side underneath.
Due to the weather focus, I needed some good-looking weather emoji. The font used by the client is DejaVu Sans, which has some weather emoji, but they’re not great. So part of the build process involves yoinking out some nicer ones from Google’s Noto Emoji font and merging them into DejaVu Sans.
Interactivity
The interactive elements and server-specified refresh interval open up some possibilities I haven’t fully explored. For example, after tapping a button you could have the server provide some totally different content, perhaps a menu with further actions. You could specify a shorter refresh interval for that screen, and have the server revert to the default view on the next refresh.
All of this would require managing the UI state on the server, and wouldn’t make for a very snappy interface, but for the occasional settings tweak it would be fine.
You could also just have the server rotate through different views on each refresh.
Making your own
It should be fairly easy to set up your own dashboard using Koboard: follow the readme to install NickelMenu and Koboard on the device, and point it at a server. You can use Homesrv if it suits your needs, or implement your own that serves whatever information you want in whatever layout you want. The API schema is documented in the Koboard repo.
There’s also a command-line tool for rendering a PNG image from the API data, previewing what it would look like on the device. This is handy if you’re building your own server with AI — the agent can easily check its work using the CLI.
One caveat here is that I’ve only tested with this one device. There’s no reason it wouldn’t work with other Kobo devices, but it’s possible some tweaks might be needed. Pull requests to add (or confirm) support would be welcome.
Build cost
For the software, the cost was about five bucks in Deepseek credits.
For the hardware, the cost was either zero dollars or $313 AUD, depending on how you count it. I had all the materials lying around; but to repurpose my old Kobo in this way required me to have bought a replacement one, which cost $269 plus $44 for the case.
Now as I said, the aging Kobo Glo HD was due for replacement anyway. But maybe I could have squeezed another year or two of usage out of it before the dying battery made it totally untenable, or I fumbled and dropped it in the bath. So if we assume two years, and amortise the cost of a once-per-thirteen-years $313 Kobo purchase over that time, we get a hardware cost of 313 × (2/13), which works out to about $48.
Plus a bunch of my time, I guess. ◼