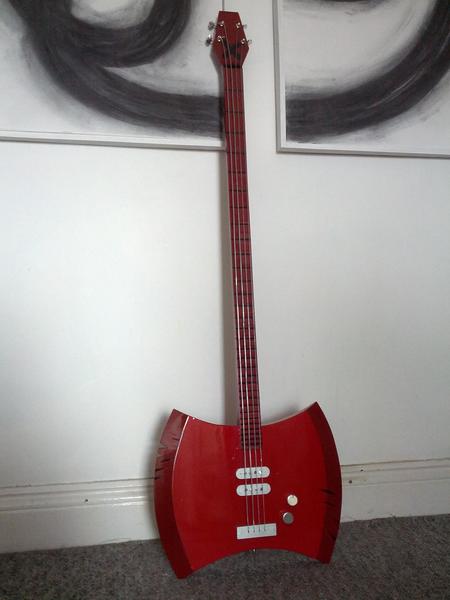
Marceline's axe bass
I'm a fan of Adventure Time, so I thought it would be fun to make a replica of one of the coolest objects from the show, Marceline's axe bass:

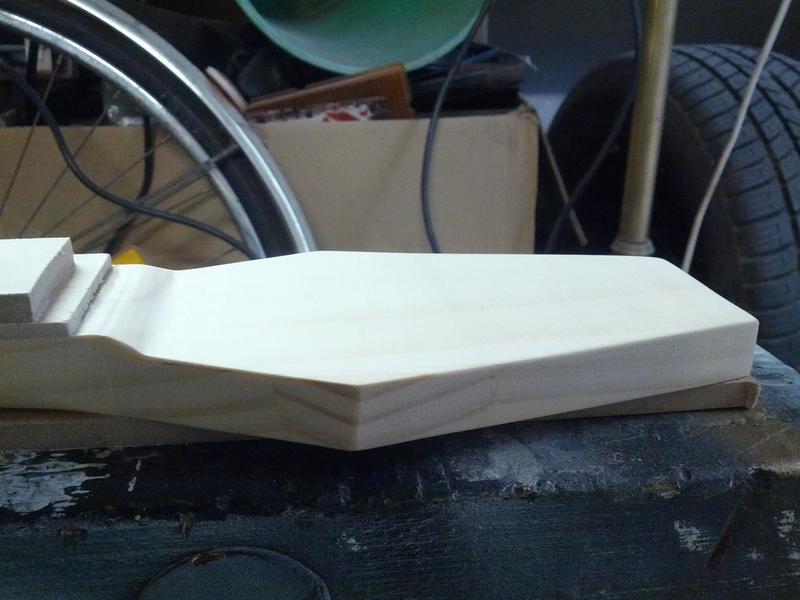
Body
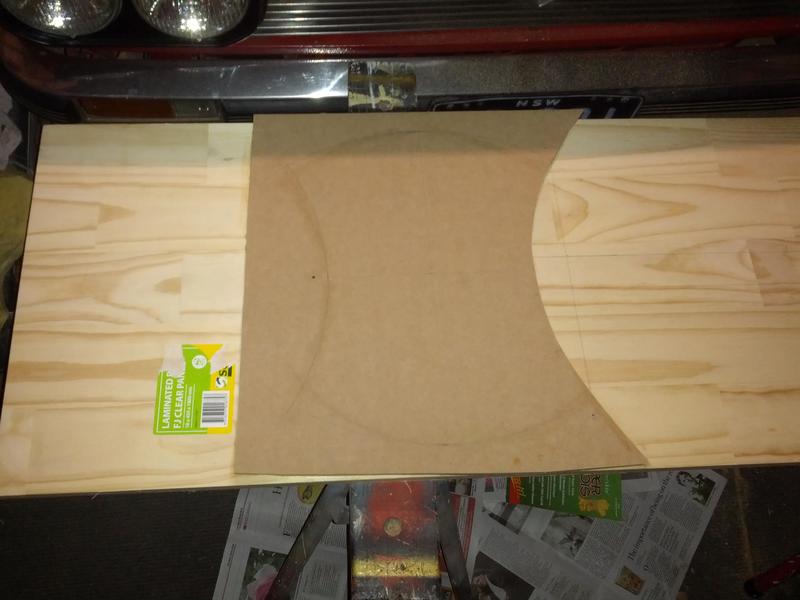
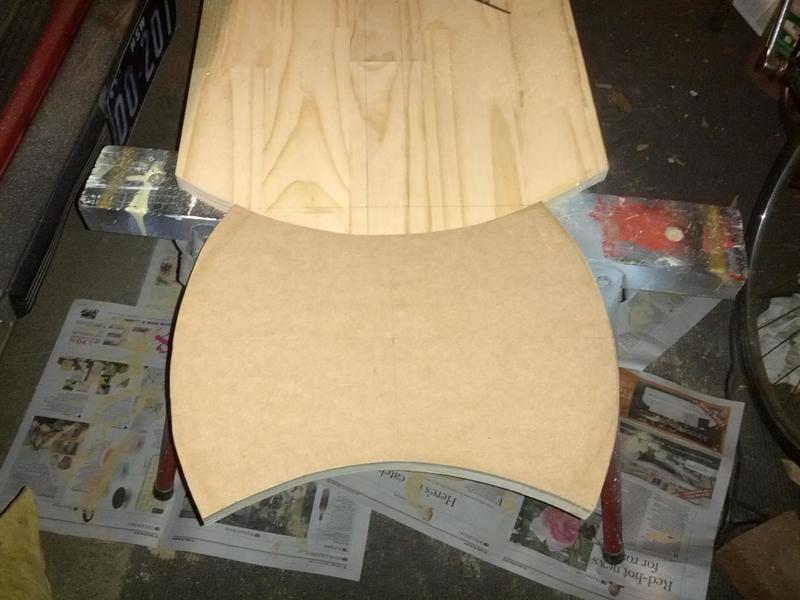
The body and neck are made from a combination of 19mm laminated pine and MDF, which I bought in huge sheets and took home using my highly practical mode of transport.
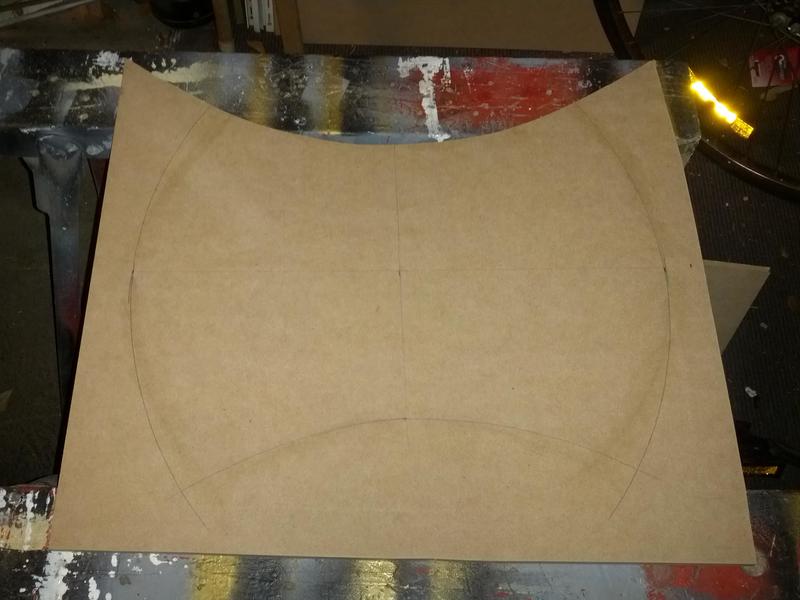
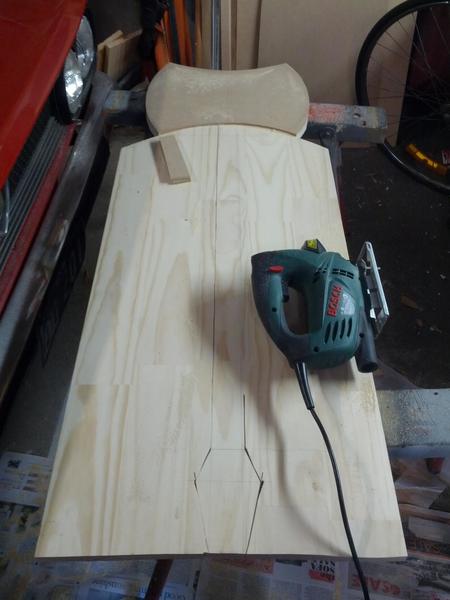
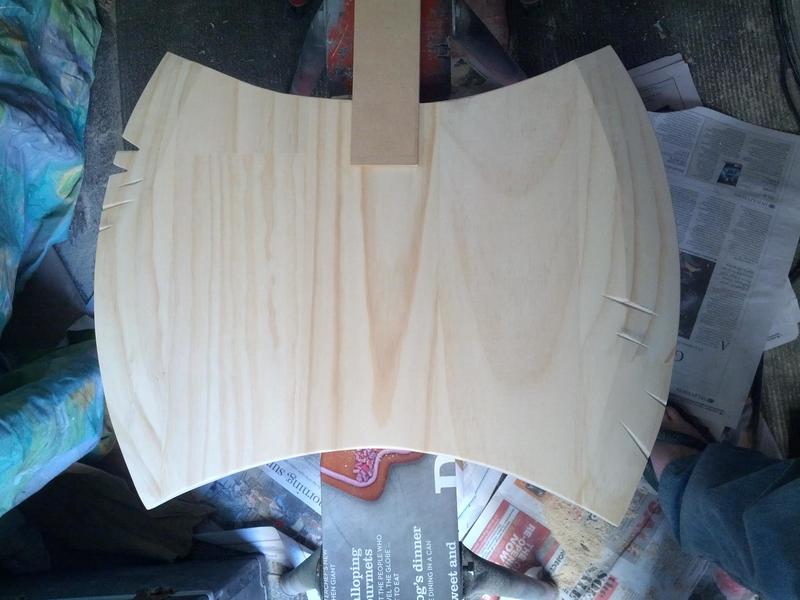
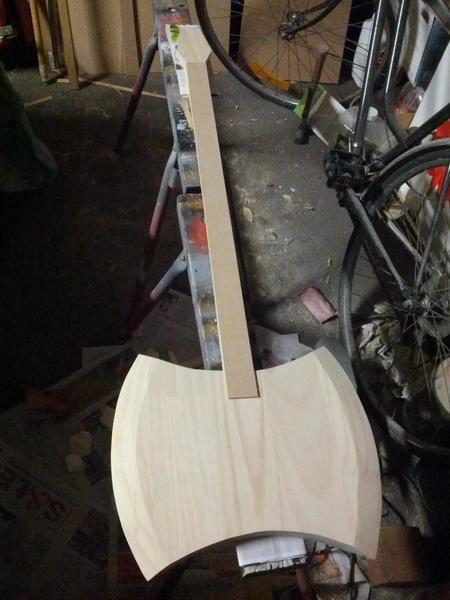
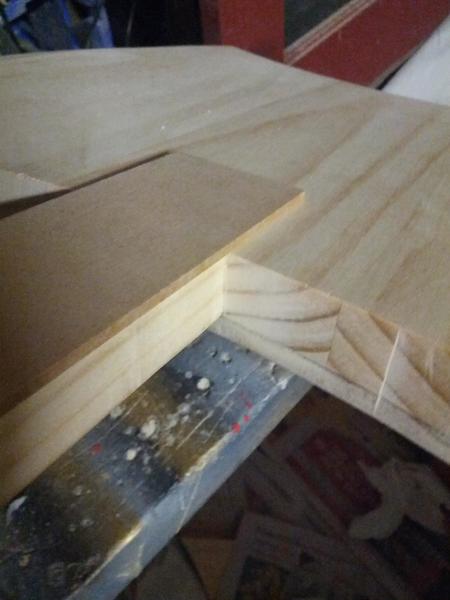
To give the body a bit more thickness I layered it with 6mm MDF. I drew the shape of the body onto the MDF sheet, and glued it down to the pine panel, and cut out the shape with a jigsaw. (The top part of the MDF had to be cut before gluing, otherwise I would have cut through the part that would become the neck.) Then I cut out the neck itself. This was especially tricky due to the sharp turns needed.
The jigsaw I was using had a bent blade, which made some of the cuts wonky. I realised too late that there was a spare blade in the jigsaw's carry case. That my first mistake the project. The second, far more serious mistake was that I made the neck too long. I wanted to put real bass guitar strings on the axe bass, but for some reason I didn't think to check how long a bass guitar actually is, and dramatically overestimated it. I ended up with a length about six inches longer than even an extra-large bass.
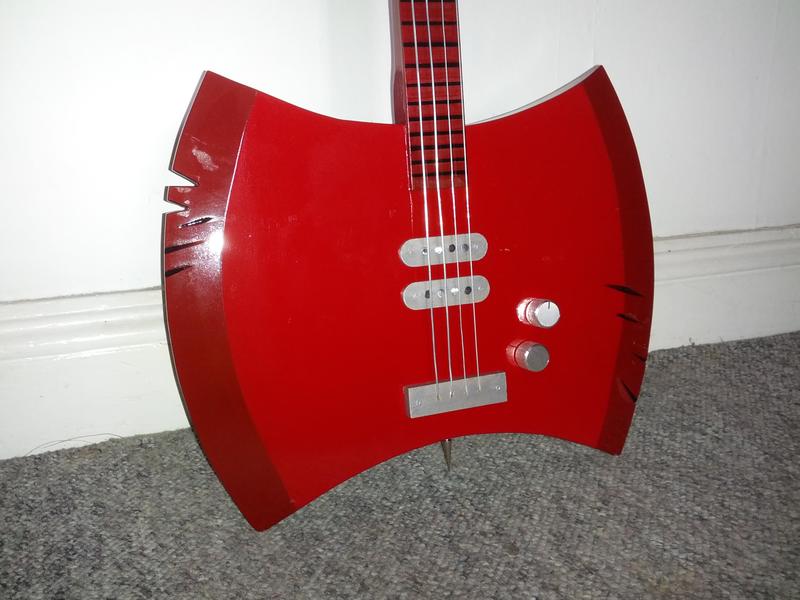
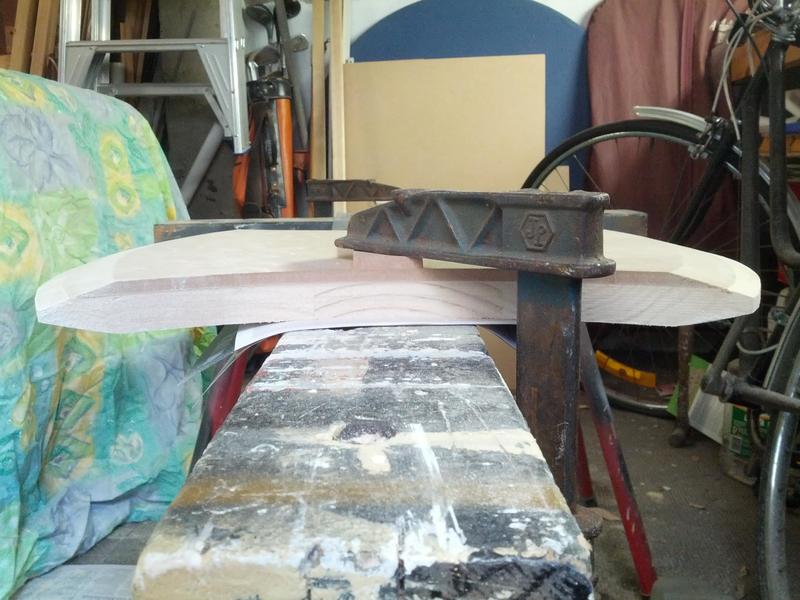
Since this is supposed to be an axe, the edges of the body had to taper to a point. I did this using a belt sander. Using some G-clamps I fastened the body to the saw-horses, and ran the belt sander along the edges while holding it at an angle, which worked better than expected.
Since Marceline's axe bass was originally a battle-axe, it has visible marks of damage. To emulate this I used a steel file to make some deep scratches around the edges, copying the positions as accurately as I could from the animation reference image. I used the jigsaw for two larger cuts.
Neck
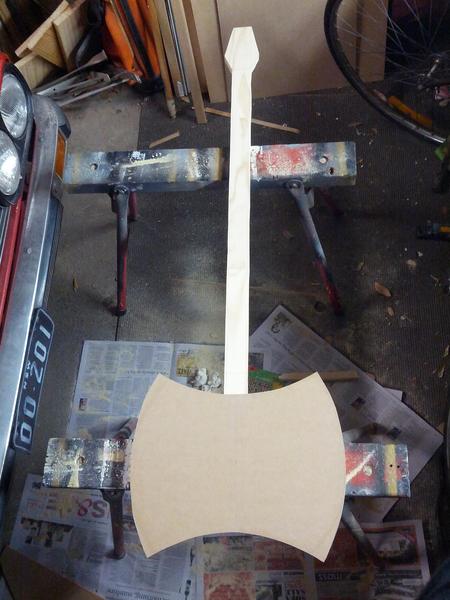
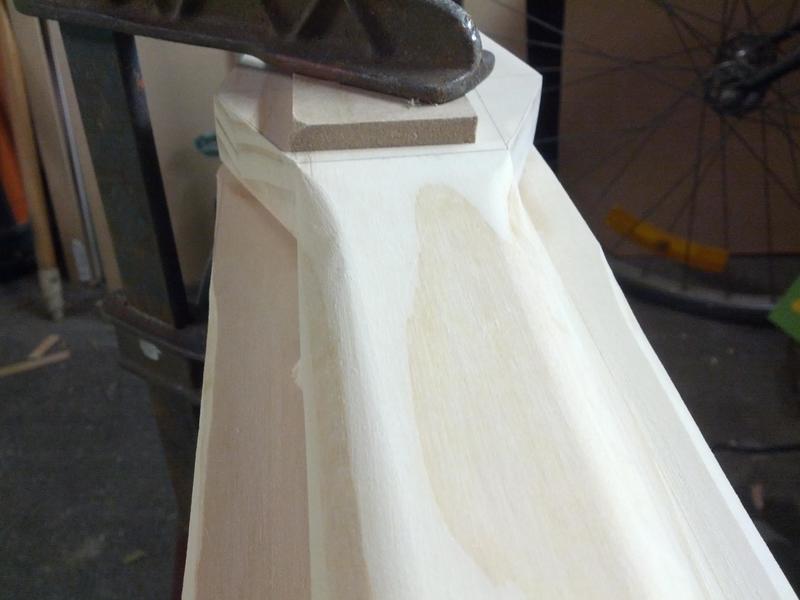
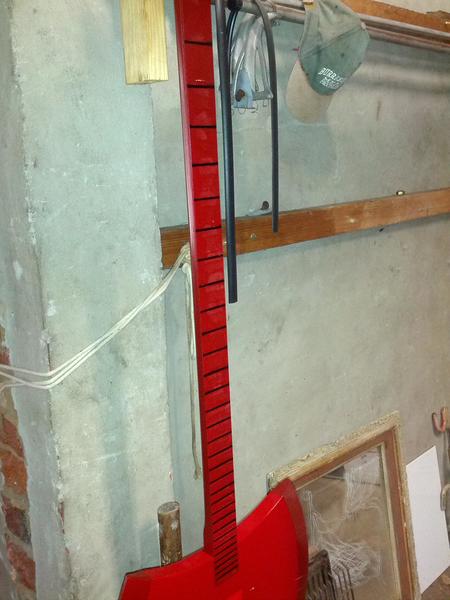
To give the neck a bit more definition, I glued a piece of 3mm MDF over it as the fretboard. This was a lot tricker than I expected, because every time I tried to clamp it down, the MDF would slide over the glue a little bit and end up slightly out of place. Eventually I got it right. When the glue had set, I spent a lot of time sanding the sides to get the neck nice and straight. Then I flipped it over and got to work rounding out the back of the neck. To start with I held the belt sander at a 45 degree angle and ran it along the edges, then I switched to coarse-grit sandpaper and rounded it out more. When it was about the right shape, I used 600 grit sandpaper to remove the scratches and get the neck really smooth.
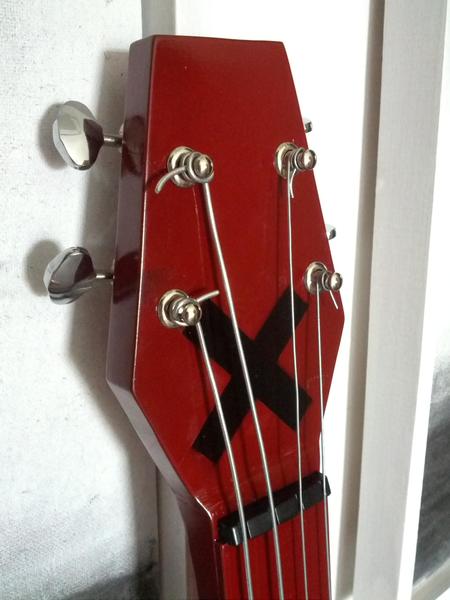
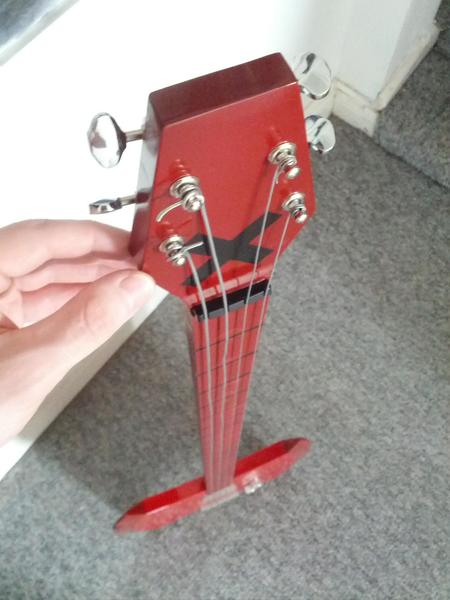
I bought some tuning pegs on eBay for about six bucks from some random seller in China. When they arrived I realised the posts weren't quite long enough to fit satisfactorily though the headstock. So I had to sand down the headstock with the belt sander. This turned out really well. Then I drilled the holes for the tuning pegs. The holes ended up being a bit rough and one of them ended up a bit too close to the edge, but good enough.
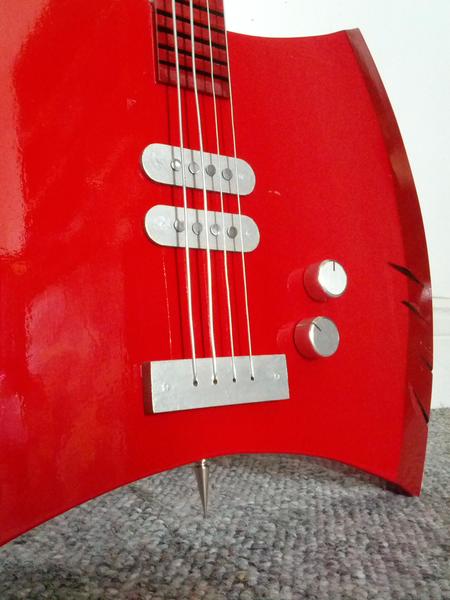
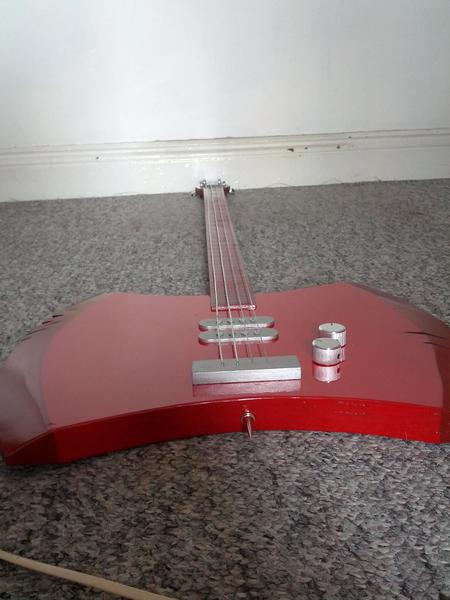
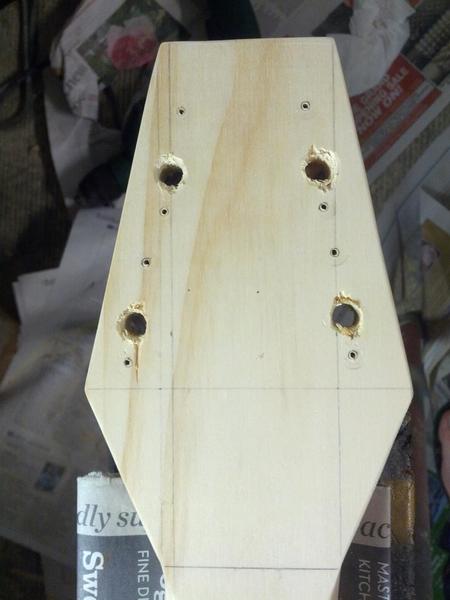
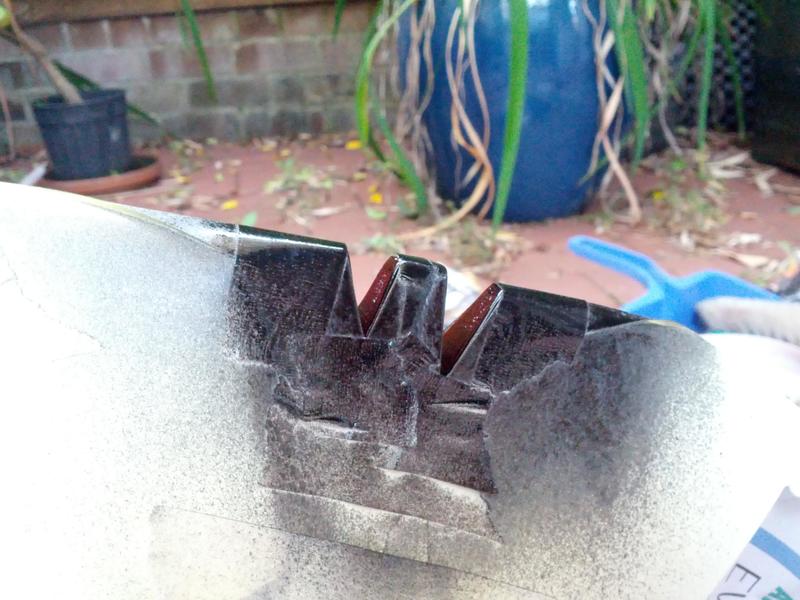
The last step before painting was to mark the positions and drill holes for the bridge and pickups. These were all made from small pieces of MDF painted silver.
Main painting
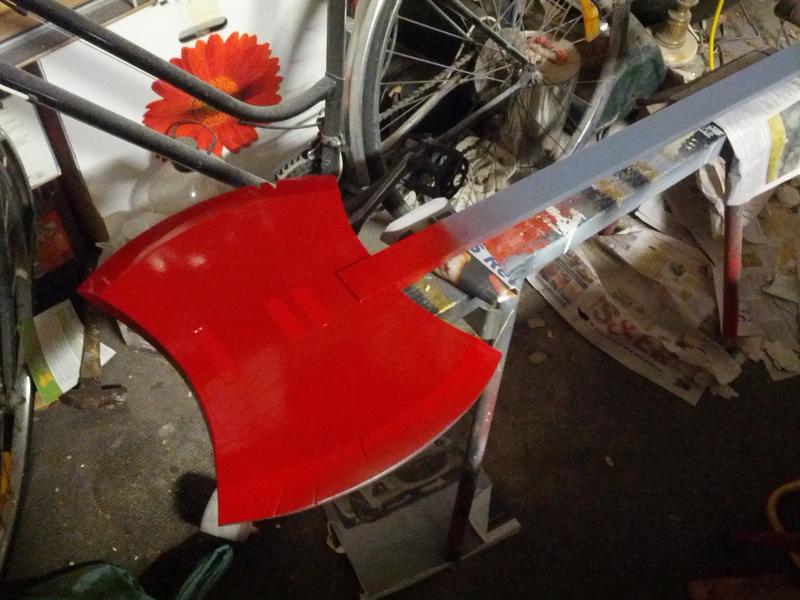
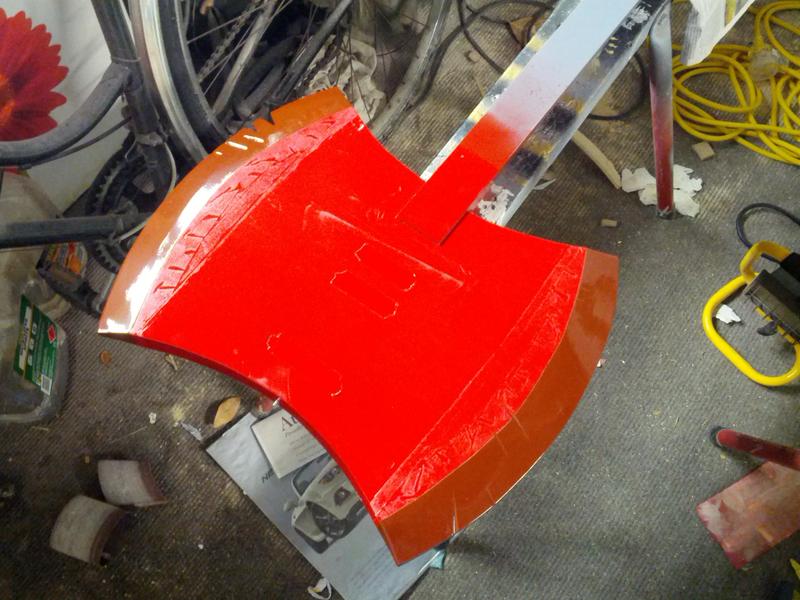
The body of Marceline's bass is mainly normal red, but the neck and the edges of the body are a darker maroon colour. I bought a can of red spraypaint, a can of black, and a can of grey primer, but nowhere I looked had the right shade of maroon spraypaint. Eventually I found some spraypaint at Super Cheap Auto calling itself "Indian red", but as I discovered when I got it home, it was really just brown. I figured that would have to do.
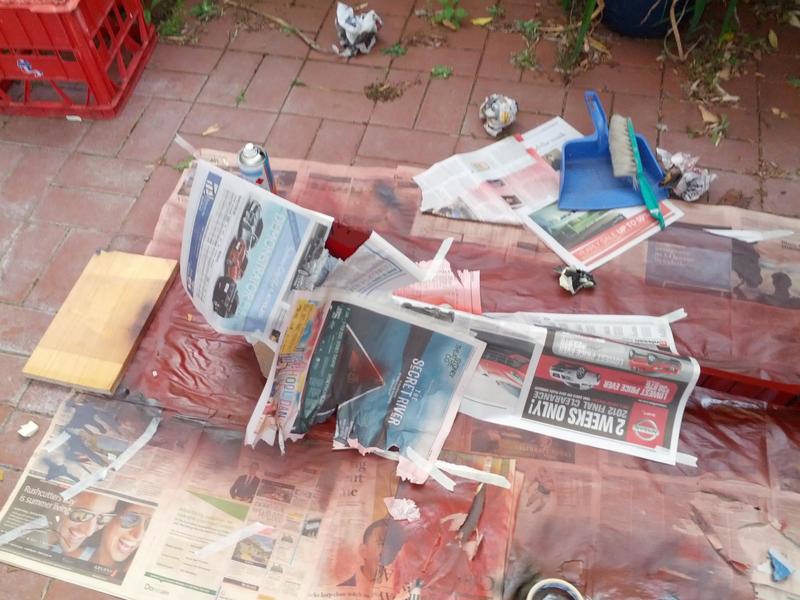
I started with a couple of coats of primer over the entire bass. Then I gave the body a couple of coats of red. Then I used newspaper and masking tape to mask off the main part of the body, and painted the edges of the body with the brown paint.
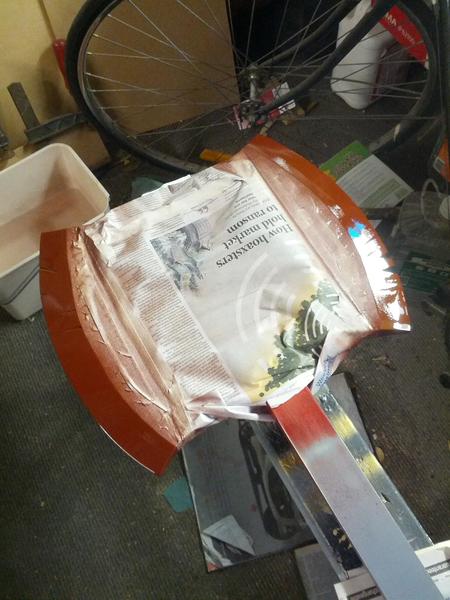
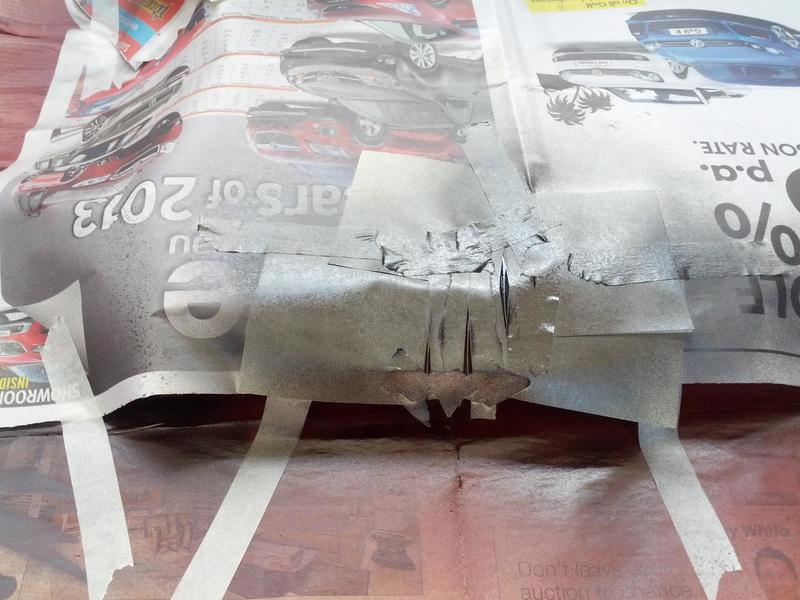
Painting was by far the most frustrating and error-prone part of the build. This was mainly due to my own inexperience. When spraypainting you're supposed to put down a lot of thin coats, but in my inexperience I thought I could save time by putting down fewer, thicker coats. What happened instead was that each coat stayed soft for days and days afterward, making it very easy to damage the finish. So when I removed the paper and masking tape after spraying the edges brown, I found that the formerly pristine red finish was now ruined.
I sanded back the screwed up finish, but in doing so I messed up the line between the red and brown areas. I gave the whole thing a good sanding and re-coated it in red. Then I left it to dry properly for a few days. Unfortunately that wasn't enough, and when I went back and re-did the brown edges, the exact same thing happened.
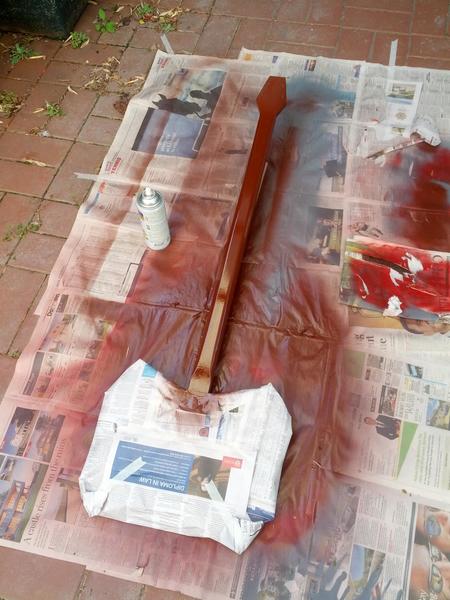
At this point, I realised that I could get roughly the right maroon colour by covering the brown parts with a light coat of red. That would let me kill two birds with one stone: get the colours right, while re-finishing the messed up red parts.
I masked off the body again so only the neck was exposed, and coated it in brown. Then I sanded back all the parts where the finish was screwed up from the masking tape, and applied the final red coat.
Detail painting
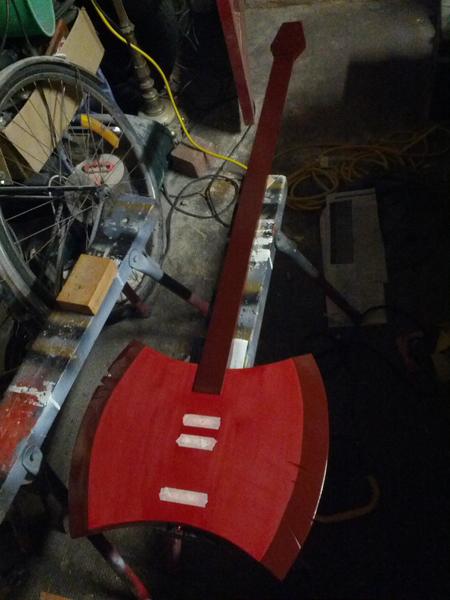
A few more things had to be painted on. The first things was the frets. This was a petty tedious process because there are 32 frets and I had to mask off the space between each of them before painting. In an attempt to avoid screwing up the finish with masking tape, I used Post-it notes for this. I bought a pad of 100 Post-its and used almost the entire thing. (I did end up using some masking tape for the sides of the neck as well.)
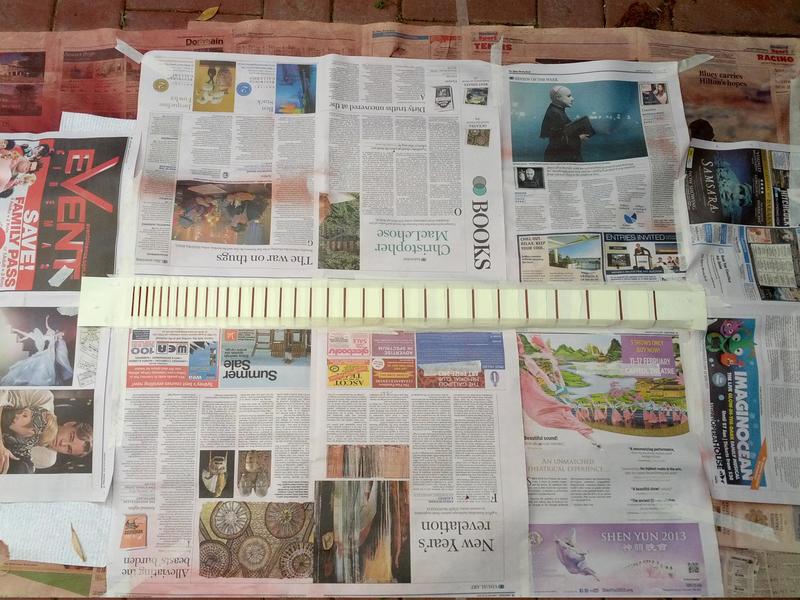
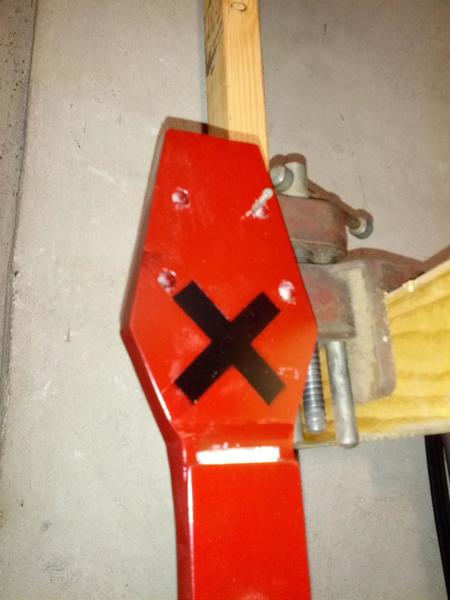
They did end up damaging the paint slightly, and a few of the frets have fuzzy edges where the Post-it notes didn't quite stick properly and the black paint got where it shouldn't have. Overall though, I think it looks pretty decent. The Post-its were also useful for painting the black X on the headstock.
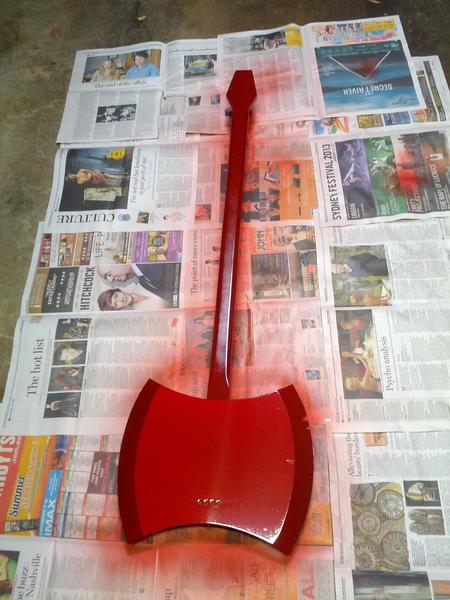
The last painting step was the damage marks. They already looked OK, but I wanted them to pop out a bit more so I gave them the Post-it note treatment too.
Other hardware
The last phase was to attach various small pieces of hardware. The tuning pegs, bridge and pickups were all pretty trivial to attach using screws and nails. The polepieces (circular metal things on the pickups) are just nails which I cut down to about half an inch, polished a bit and hammered into pre-drilled holes in the pickups. The nut is just an ordinary bass guitar nut I bought on eBay for a few dollars, and glued on with epoxy.
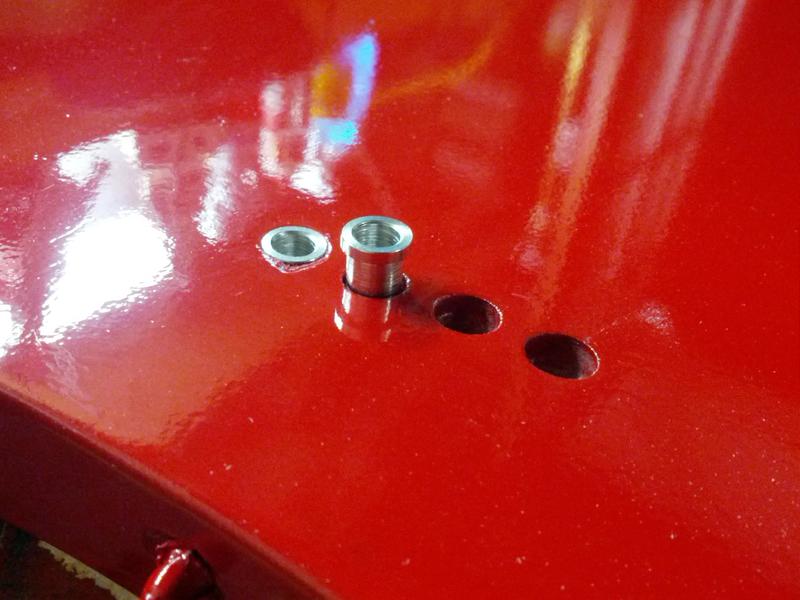
The strings are mounted through the body, with some ferrules ($1.60 delivered from China) to hold the ends of the strings.
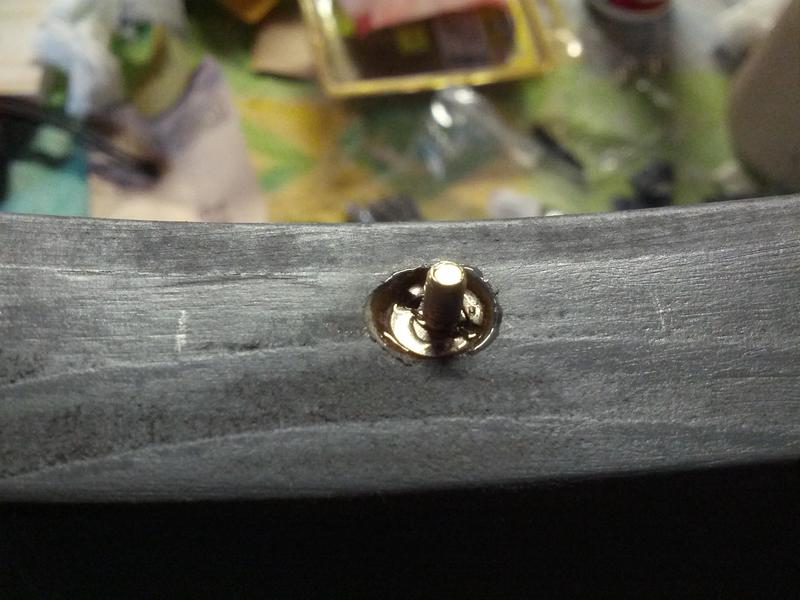
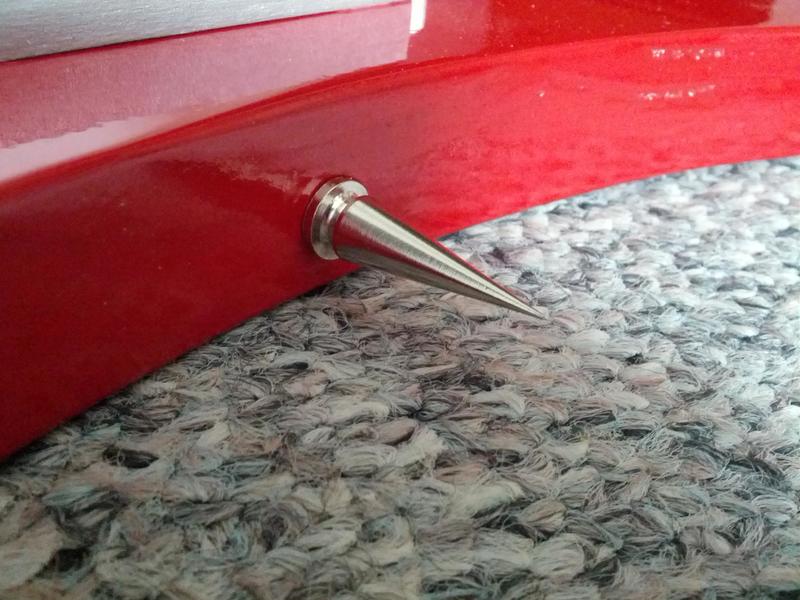
The spike at the bottom of the body is another eBay purchase. There are tons of sellers in China making metal spikes of various sizes for punk clothes. I got the biggest ones I could find, about 3cm long. A bag of ten set me back $3.14. Attaching the spike was a little tricky. Each one comes with a screw that fits into the base, and the screw is pretty short. Long enough to attach the spike to a leather jacket or something, but not ideal for mounting on a piece of wood. What I ended up doing was gluing the screw onto a little piece of dowel, and then wrapping some thin wire around the base of the screw and through a hole in the dowel for extra strength. With the screw pretty firmly attached to the dowel, I drilled a hole in the base of the guitar and glued the dowel in so the screw was sticking out. It seems to be holding on pretty well.
The last thing was the volume/tone knobs. These were just metal knobs I bought at an electronics store. I drilled a couple of holes in the body, glued in short pieces of dowel, and glued the knobs onto the dowel.
Photos